
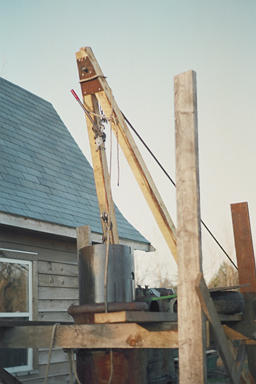
So it's Spring and time to get the wraps off the Alldays &
Onions 300cwt air hammer, set up some stageing and rigging. Time to
have a look at the bores, the tup, the compressor piston, bearings and
whatnot.
The tup was seized when the hammer arrived. Last fall my son and I
got the lower die out, making room for a hydraulic jack. That freed
the tup up readily and it's been soaking in kerosene and oil all
winter. This spring it lifted out easily.
Note the threaded hole in the crown for a lifting clevis. How nice!
The top die was held in with about 4" of wedge and so tightly that it
had to be cut out with a torch. Happily it was possible to do that
without damaging either the tup or the die. Surprise! The tup is
hollow! And the mating faces are in good condition so refitting the
die will only be as hard as making a new wedge.
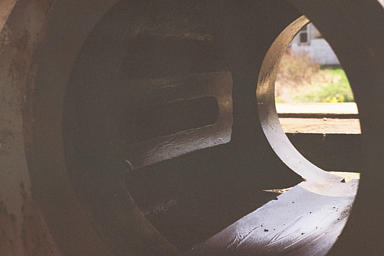
Only a little scuffing on the surface and in the bore. I'm guessing that the helical groove in the tup is to let oil work its way down from above but it might have some other purpose.
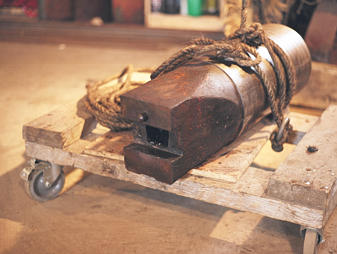
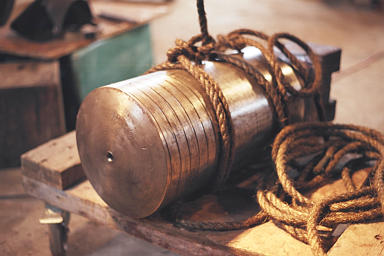
 The compresor piston was a bit harder. Just the head was a biggish
chunk of iron. Fortunately, it, too, had a threaded lift point.
Gee, these Brits think ahead. Go, Brits! The hammer stood
out of doors for several years and the well in the head stayed full of
water so it was pretty rusty. But the lift point threads cleaned up
okay. Here it is, brushed up and painted.
The compresor piston was a bit harder. Just the head was a biggish
chunk of iron. Fortunately, it, too, had a threaded lift point.
Gee, these Brits think ahead. Go, Brits! The hammer stood
out of doors for several years and the well in the head stayed full of
water so it was pretty rusty. But the lift point threads cleaned up
okay. Here it is, brushed up and painted.
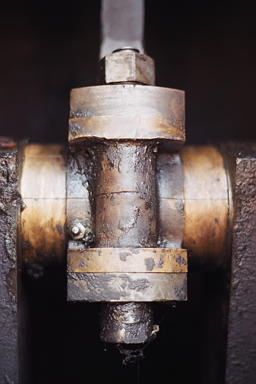
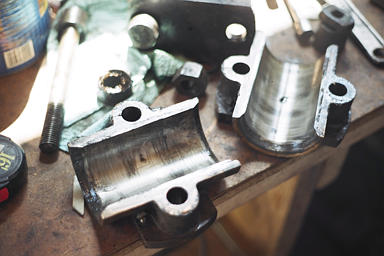
The connecting rod had to come out with the piston. That meant getting the big end bearing off. What do you know? Somebody added a zirk fitting that was hidden under all that grease. An no little dinky bearing shells here. Heavy pieces of bronze with babbitt lining.
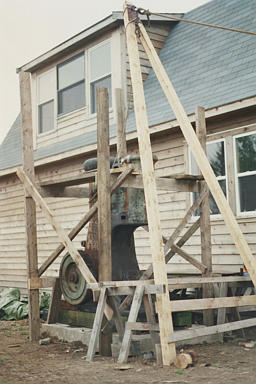
Okaayyyy! How about wheedling that piston out of there?
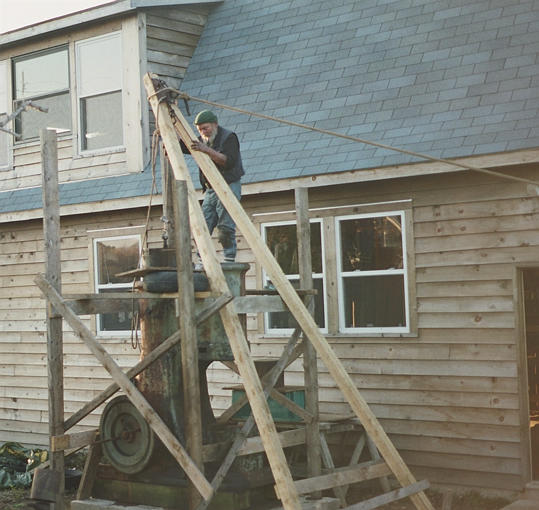
Not such a very heavy load but a bit of a strain on my guy rope with the scissors tilted over so far. The guy rope runs through a block to another come-along but I think when I put the piston back, I'll replace the single rope with a set of double sheave blocks. That guy rope has a splice in it and it was pretty taut.
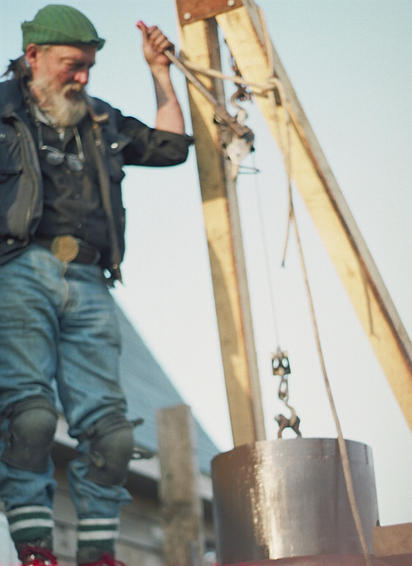
All the rigging is working right and the
come-along is doing just fine. Everything is creaking a bit and
my son is down below, giving the connecting
rod a nudge with a 2x4 whenever the piston sticks a bit in the bore.
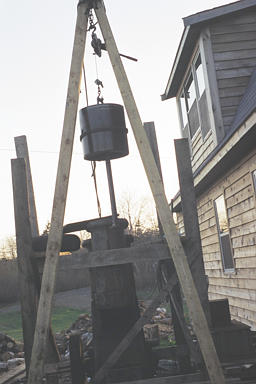
It's coming out....................................................................................... And there it is.
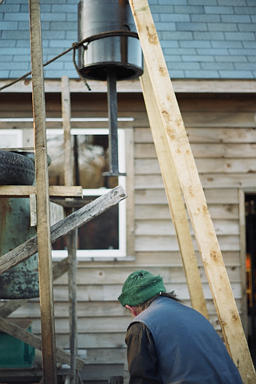
Coming down............................................................................................And safely landed.
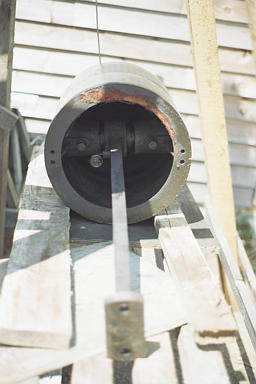
 The control valve sleeve runs the width of the hammer and there's some
kind of filter of deflector missing on top of the hammer that exposes
the sleeve to weather and passing trash so I wrassled that out, too.
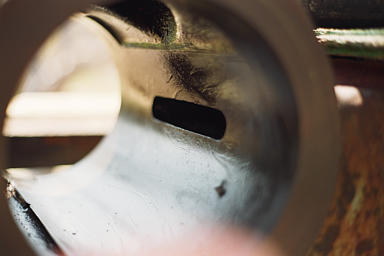
Here's the valve bore showing the port toward the tup. Note a little
groove on the far side of the bore at about 6 o'clock: a set screw is
tapped into the joint between the sleeve and the bore to keep the
sleeve from turning. Took an hour to get that out.
The control valve sleeve runs the width of the hammer and there's some
kind of filter of deflector missing on top of the hammer that exposes
the sleeve to weather and passing trash so I wrassled that out, too.
Here's the valve bore showing the port toward the tup. Note a little
groove on the far side of the bore at about 6 o'clock: a set screw is
tapped into the joint between the sleeve and the bore to keep the
sleeve from turning. Took an hour to get that out.
A few day later, my little box of 4 springs arrives in Halifax —
priority courier from Chicago to Moncton, priority courier from Moncton
to Halifax and who knows what else tacked on for good measure — COD C$129.00. After some,
umm.... heated negotiation, I still paid $100. So I have
four of the nicest little $25 springs you ever saw, happily, in all
likelihood, a lifetime supply.
Photos
Thanks to my son David for taking the photos and getting them
digitized and back to my computer on CDs!
[ Home ] —
[ Alldays valve ] —
[ New blacksmith shop ]