Alldays & Onions 300# hammer: Die inserts
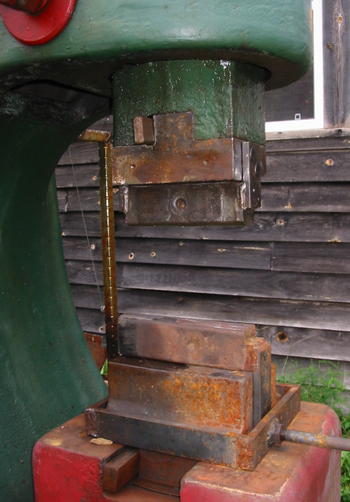 The Alldays & Onions came with half-flat/half-bevel dies. They
are, I suppose, meant for heavy forging in a ship or railway shop,
and that with a helper and maybe a hammer driver as well. They don't
lend themselves to singlehanded, freehand forging very well. What to
do?
I made several tools that clamped to the lower die with the band
shown. The one shown here worked best but operations such as necking
or drawing-out remained awkward with the asymmetrical flat-upper plus
crowned-lower combination. This was reinforced at a recent hammer-in
by watching Ian Hope-Simpson demo on his 100#, flat-die hammer with a
crowned lower insert and flat upper die. He did it very well but
deployed large amounts of effort and skill to cope with the asymmetry.
So here I've made inserts from segments cut from those heavy, dog-leg
helper springs used on large trucks, compliments of my friendly
neighborhood heavy equipment shop. Each piece is milled flat on one
side.
Oops! That upper die didn't work. Scroll down to fail
to read about it.
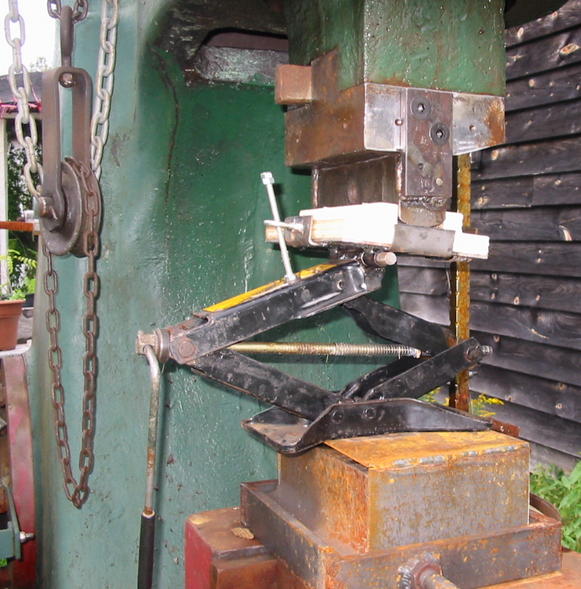 So here's the upper insert being installed. There's a 10 ga. bridge
over the lower die to make a flat place for the jack. Jack is a
Cavalier car jack with a pivoting table added to hold the upper die.
Installation requires several steps:
- Run hammer, drop the tup on a wooden block and stop the hammer.
- Tighten the adjustable tup guide bar until the tup is locked in
place. The guide bar is a wedge, faced on one side with a bronze
plate, that rides against the flat back face of the tup and keeps
it aligned. One end is visible as a fat threaded rod and nut in
upper left of the last image.
- Knock out the wood block.
- Install bridge, place jack and die on the bridge and jack the die
into position. Knock in the retaining wedge. I should be able
to omit this step when removing or installing the insert but it was
required now because the die had been out to go to the machine shop.
- Lower jack, add adapter to hold die insert, jack insert into
position and bolt it in.
- Remove jack and bridge, slack off guide bar until the tup drops.
- Run hammer and tweak guide bar tension until tup runs
smoothly, lock the guide bar adjustment.
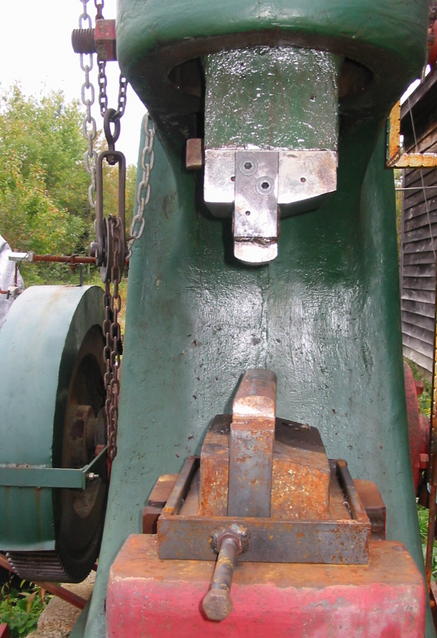 If you're paying attention, you'll have noted, in the last pic, that
the clamping bolt isn't centered on the lower insert tab. That's been
fixed.
The sling in the 2nd and 3rd pics hangs from a jib crane made from an
old gas station's hollow octagonal signpost sunk in an old washing
machine shell full of concrete. It allows holding a heavy workpiece
with one hand. Easy rotation around the long axis of the workpiece is
provided by the lower chain loop which runs over the wheel seen in the
photos.
The crane is so positioned as to allow access to the hammer from the
front or from one side and swings away to where I can put a portable
forge. It includes a light chainfall, resurrected from the junk heap,
that allows adjusting the height of the sling to match the dies with
or without inserts or tooling.
I didn't feel confident of my ability to tap 1/2x13 blind holes in
hard steel and my machinist was himself doubtful. But it went well
for him and the result is as you see, with two flathead cap screws on
each end of the insert. It may be necessary to use some heat to tweak
the fit of the insert to the die but I'll torque up the screws and
give it a try before I fiddle with that.
Fail!
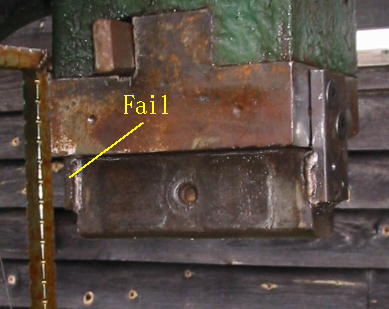
|
| Rear mounting tab interferes with guide
|
The rear tab or ear by which the upper die insert is screwed to the
upper die lay on the rear face of the die, same as seen, for the front
tab, in the first image. There was plenty of clearance in the hammer
bore. That's fine in the front but in the rear, this tab interferes
with the tup guide bar.
In the last photo, you can see the flats on the back of
the tup where the bronze-faced guide bar rides. I stupidly failed to
think of this beforehand.
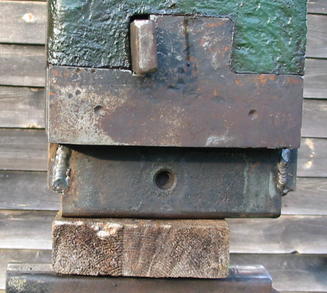
Fixed.
|
| Mounting tab is recessed in rebate
|
|
|
So the insert attachment tab can't stand above the flat faces on the
back of the tup. Here you can see that the mouting tab is no longer
proud of the rear die face.
My machinist milled a rebate in the die -- hard stuff that gave a carbide
cutter a hard work-out -- and deepened the threaded holes for the cap
screws. Cut the insert down to match the die dimension, cut through
the tab weld with a zizz wheel, reweld. The next photo shows the rear
attachment in the rebate.
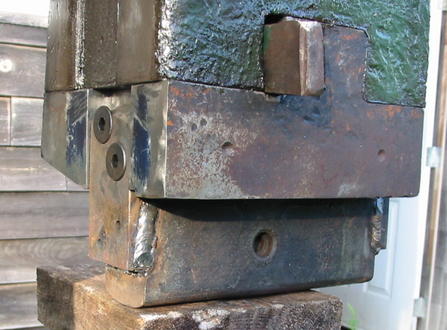 And there it is. The hammer works fine. I now have shaping dies
suitable for interesting forgeing. (In this image, you can see the
flats on the rear of te tup against which the guide bar rides.)
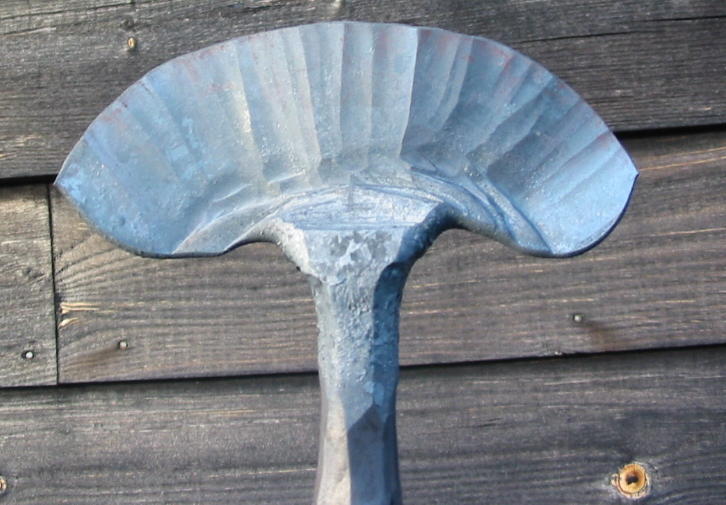
Oh, well, that was the "last" image but, just as proof of concept,
I've finally actually forged something with this beast.
Back to the Alldays start page
Created: Mike Spencer -- Wed 08 Oct 2014
Updated: Wed 22 Oct 2014
 The Alldays & Onions came with half-flat/half-bevel dies. They
are, I suppose, meant for heavy forging in a ship or railway shop,
and that with a helper and maybe a hammer driver as well. They don't
lend themselves to singlehanded, freehand forging very well. What to
do?
 So here's the upper insert being installed. There's a 10 ga. bridge
over the lower die to make a flat place for the jack. Jack is a
Cavalier car jack with a pivoting table added to hold the upper die.
Installation requires several steps:
 If you're paying attention, you'll have noted, in the last pic, that
the clamping bolt isn't centered on the lower insert tab. That's been
fixed.


 And there it is. The hammer works fine. I now have shaping dies
suitable for interesting forgeing. (In this image, you can see the
flats on the rear of te tup against which the guide bar rides.)
